Using Testkube with ArgoCD
This document describes how you can use Testkube with ArgoCD. As a prerequisite, you should have good understanding of both Testkube, ArgoCD and GitOps principles.
For a high-level introduction to using Testkube with ArgoCD including a step-by-step tutorial, please check out our GitOps blogpost.
Managing Testkube CRDs with ArgoCD
Testkube stores its core resources (Workflows, Triggers, etc.) as Custom Resources in the Testkube Control Plane. This makes it straightforward to manage them using a GitOps approach with a tool like ArgoCD.
To use Testkube Resources in the synced cluster, the target namespace will need to have a Testkube GitOps Agent installed, which will copy resources to the Testkube Control Plane as described in GitOps with Testkube.
Once the Testkube GitOps Agent has synced Testkube resources to the Control Plane, they will be available for execution/triggering/etc.
In line with GitOps principles, any changes that you make to Testkube Resources in your cluster via the Testkube CLI or Dashboard will be overwritten by ArgoCD when it syncs these resources against your Git repo (since the Git repo is the source of truth for the state of your cluster). Therefore, make sure to make desired modifications to your Testkube Resources in your Git repo instead.
ArgoCD Integration Patterns
There are two primary patterns for running tests with Testkube when using ArgoCD:
1. Post-Sync Resource Hooks
Execute tests after ArgoCD successfully syncs your application:
2. Kubernetes Event Triggers
React to resource changes regardless of how they were applied:
Avoiding pruning of intermediate Testkube Resources
When running your Workflows, Testkube generates intermediate Job and Pod resources as described in Workflows Architecture. If ArgoCD is performing a sync with pruning enabled while Testkube is executing Workflows, there is a high likelihood that these intermediate resources will be deleted by Argo, resulting in aborted/distrupted Workflow executions.
To avoid this you will need to add the below annotations to the generated Job and Pod resources as described in Test Workflows - Job and Pod.
annotations:
  argocd.argoproj.io/compare-options: IgnoreExtraneous
  argocd.argoproj.io/sync-options: Prune=false
You can create a Workflow Template that adds these annotations to all your Workflows, instead of adding them manually.
Using Testkube Runner Agents with ArgoCD
Since a Testkube Runner Agent needs to be installed in the target namespace for your Argo Application(s), you will need to either
- Preinstall a Runner Agent in the target namespace and disable pruning in ArgoCD.
- Include the Testkube Runner Agent manifests or Helm Chart in your ArgoCD Application.
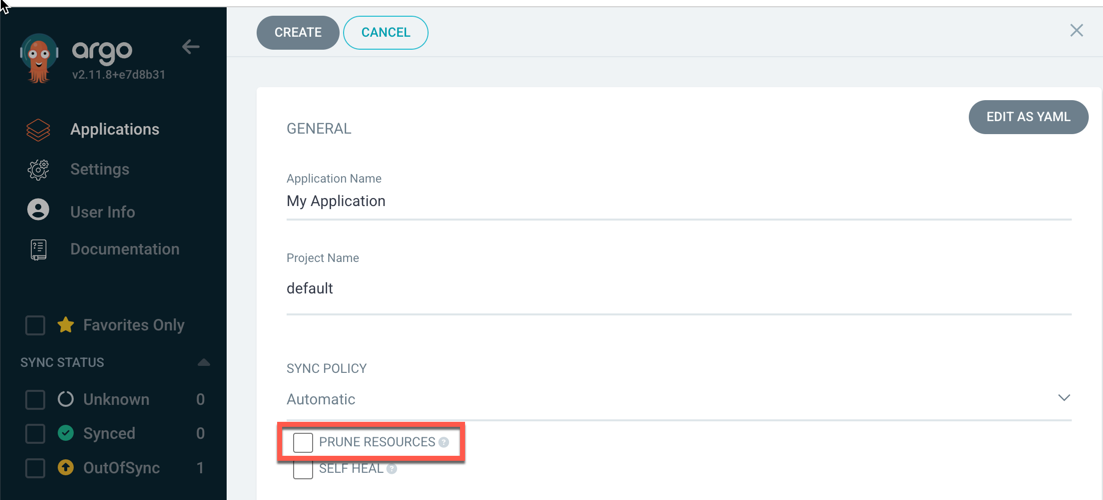
Pre-install the Runner Agent and disable Pruning
This option is more suited for long-lived namespaces - for example a dedicated namespace for a staging or development environment.
When pre-installing the Runner Agent in your target namespace, it is important to NOT select the prune option when auto-syncing your
Application with Argo, otherwise Argo will remove the Agent from your namespace when syncing.
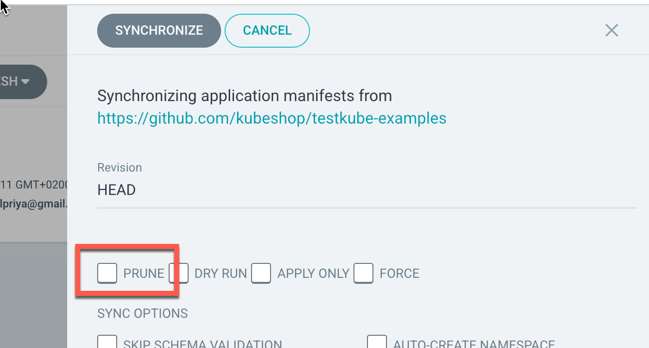
Same applies to manual synchronization - do NOT select the prune option:
Include the Runner Agent in your GitOps Repo
For ephemeral namespaces it can be more convenient to include the Agent manifests in your GitOps repo so the Agent
gets installed and synced together with any other resources you are managing with ArgoCD. You can simply use helm template
with the Testkube Helm Chart to generate the manifests to be added to your repository.
Connecting the Runner Agent to a Control Plane
To connect the Runner Agent to a Testkube Control Plane (for storing results, troubleshooting, etc), your values file will require at least the following properties:
testkube-api:
  cloud:
    key: tkcagnt_XXX
    orgId: tkcorg_ZZZ
    envId: tkcenv_YYY
    url: <url>
  minio:
    enabled: false

mongodb:
  enabled: false

postgresql:
  enabled: false

testkube-dashboard:
  enabled: false
You can find the corresponding values in the Environment Settings for the Testkube Environment that the Agent should connect to:
Triggering Workflow Executions
Once any Testkube Test Workflows have been synced to your cluster(s) it is likely that you will want to trigger these to execute corresponding Tests. You can of course trigger them manually through the CLI or Dashboard, it will probably make more sense to trigger them either using an ArgoCD Resource Hook or a Testkube Kubernetes Trigger.
- Using a Kubernetes Trigger has the advantage of being disconnected from ArgoCD; whenever a resource gets updated in your cluster, be it by ArgoCD or
some other process (
kubectl, etc.), your tests will always execute. The downside is that they will execute even if your resources are part of a larger application, which might fail synchronizing or not be initialized correctly when the test is triggered. - Using an ArgoCD Resource Hook handles the downside of Kubernetes Triggers by being more attune to the overall ArgoCD sync status; if ArgoCD for some reason fails to sync your application resources with your cluster, it won't run your tests unnecessarily (unless you want it to).
Let's have a quick look on how to set up these two approaches.
Trigger from an ArgoCD Resource Hook
Post-sync Resource hooks are executed by Argo after it has successfully synced resources within an Application - Read More.
Creating a Post-sync hook as a Kubernetes Job that runs Testkube Tests using the Testkube CLI is straightforward; the Job would be defined together with your Testkube Resource in your Git repo and ArgoCD will execute it if the synchronization of Git Resources to your Cluster is successful.
The general outline of such a Post-Sync Job is as follows:
apiVersion: batch/v1
kind: Job
metadata:
  generateName: testkube-testworkflows-execution-
  namespace: default
  annotations:
    argocd.argoproj.io/hook: PostSync
    argocd.argoproj.io/hook-delete-policy: HookSucceeded
spec:
  template:
    spec:
      containers:
        - name: execute-testworkflows
          image: kubeshop/testkube-cli:2.1.19
          command:
            - /bin/sh
            - -c
            - |
              testkube set context \
                --api-key tkcapi_ZZZZ \
                --root-domain testkube.io \
                --org-id tkcorg_XXXX \
                --env-id tkcenv_YYYY

              testkube run tw <name-of-workflow> -f
      restartPolicy: Never
The Job first sets the Testkube CLI context and then simply invokes the testkube run tw command for each Workflow that was synced, with the -f option to capture the output. (here you can obviously run any combination of Testkube CLI commands).
- The
tkcorg_XXXXandtkcenv_YYYYidentifiers can be found on the Environment Settings page. - The
tkcapi_ZZZZapi-key needs to created as described under API Token Management. - the
root-domainshould betestkube.ioif you're using Testkube Cloud, or your local Testkube API endpoint for on-prem installations.
If you need to target a specific Runner Agent in your commands, see Runner Agent Targeting.
Trigger using a Kubernetes Event Trigger
Defining a Kubernetes Trigger to react to resources being updated by ArgoCD is equally straightforward. See Kubernetes Triggers for a walkthrough of the Testkube Triggering functionality, let's just look at a short example below:
apiVersion: tests.testkube.io/v1
kind: TestTrigger
metadata:
  name: testtrigger-example
  namespace: default
spec:
  resource: deployment
  resourceSelector:
    labelSelector:
      matchLabels:
        testkube.io/tier: backend
  event: modified
  conditionSpec:
    timeout: 100
    delay: 2
    conditions:
      - type: Progressing
        status: "True"
        reason: "NewReplicaSetAvailable"
        ttl: 60
      - type: Available
        status: "True"
  action: run
  execution: workflow
  concurrencyPolicy: allow
  testSelector:
    name: frontend-sanity-tests
This will trigger the execution of the "frontend-sanity-tests" Test Workflow when any Kubernetes deployment with the
label testkube.io/tier: backend has been modified in the default namespace, which includes updates performed by ArgoCD
during resource synchronization.
Since Triggers are dependent on the target Workflows they execute, be sure to assign them an ArgoCD Sync Wave accordingly; you probably want them to be synced after their target Workflows are synced, but before the actual resources they trigger on are available.